Tag Archives: educational technology

Day 5: Strategies for Working Together

This is the fifth post in a series about launching the use of the app Book Creator in a kindergarten classroom.  You can read the first three posts by clicking on the links below.

Today’s blog post is written by guest blogger Laura Meehan.  Laura is an Instructional Digital Age Learning Coach with a specialty in math and science. You can follow her on Twitter @LauraMeehan04


IMG_5198.JPGNext up in the “Katie & Laura are overwhelmed by kindergarteners” series…Strategies for Working Together!

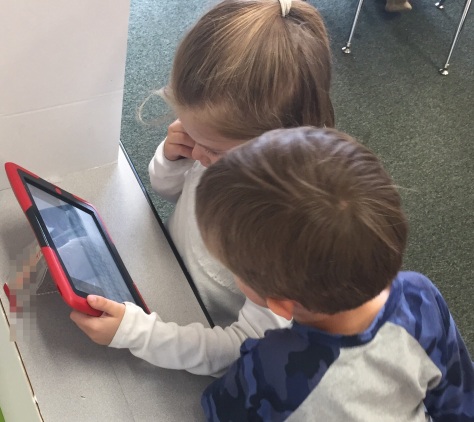
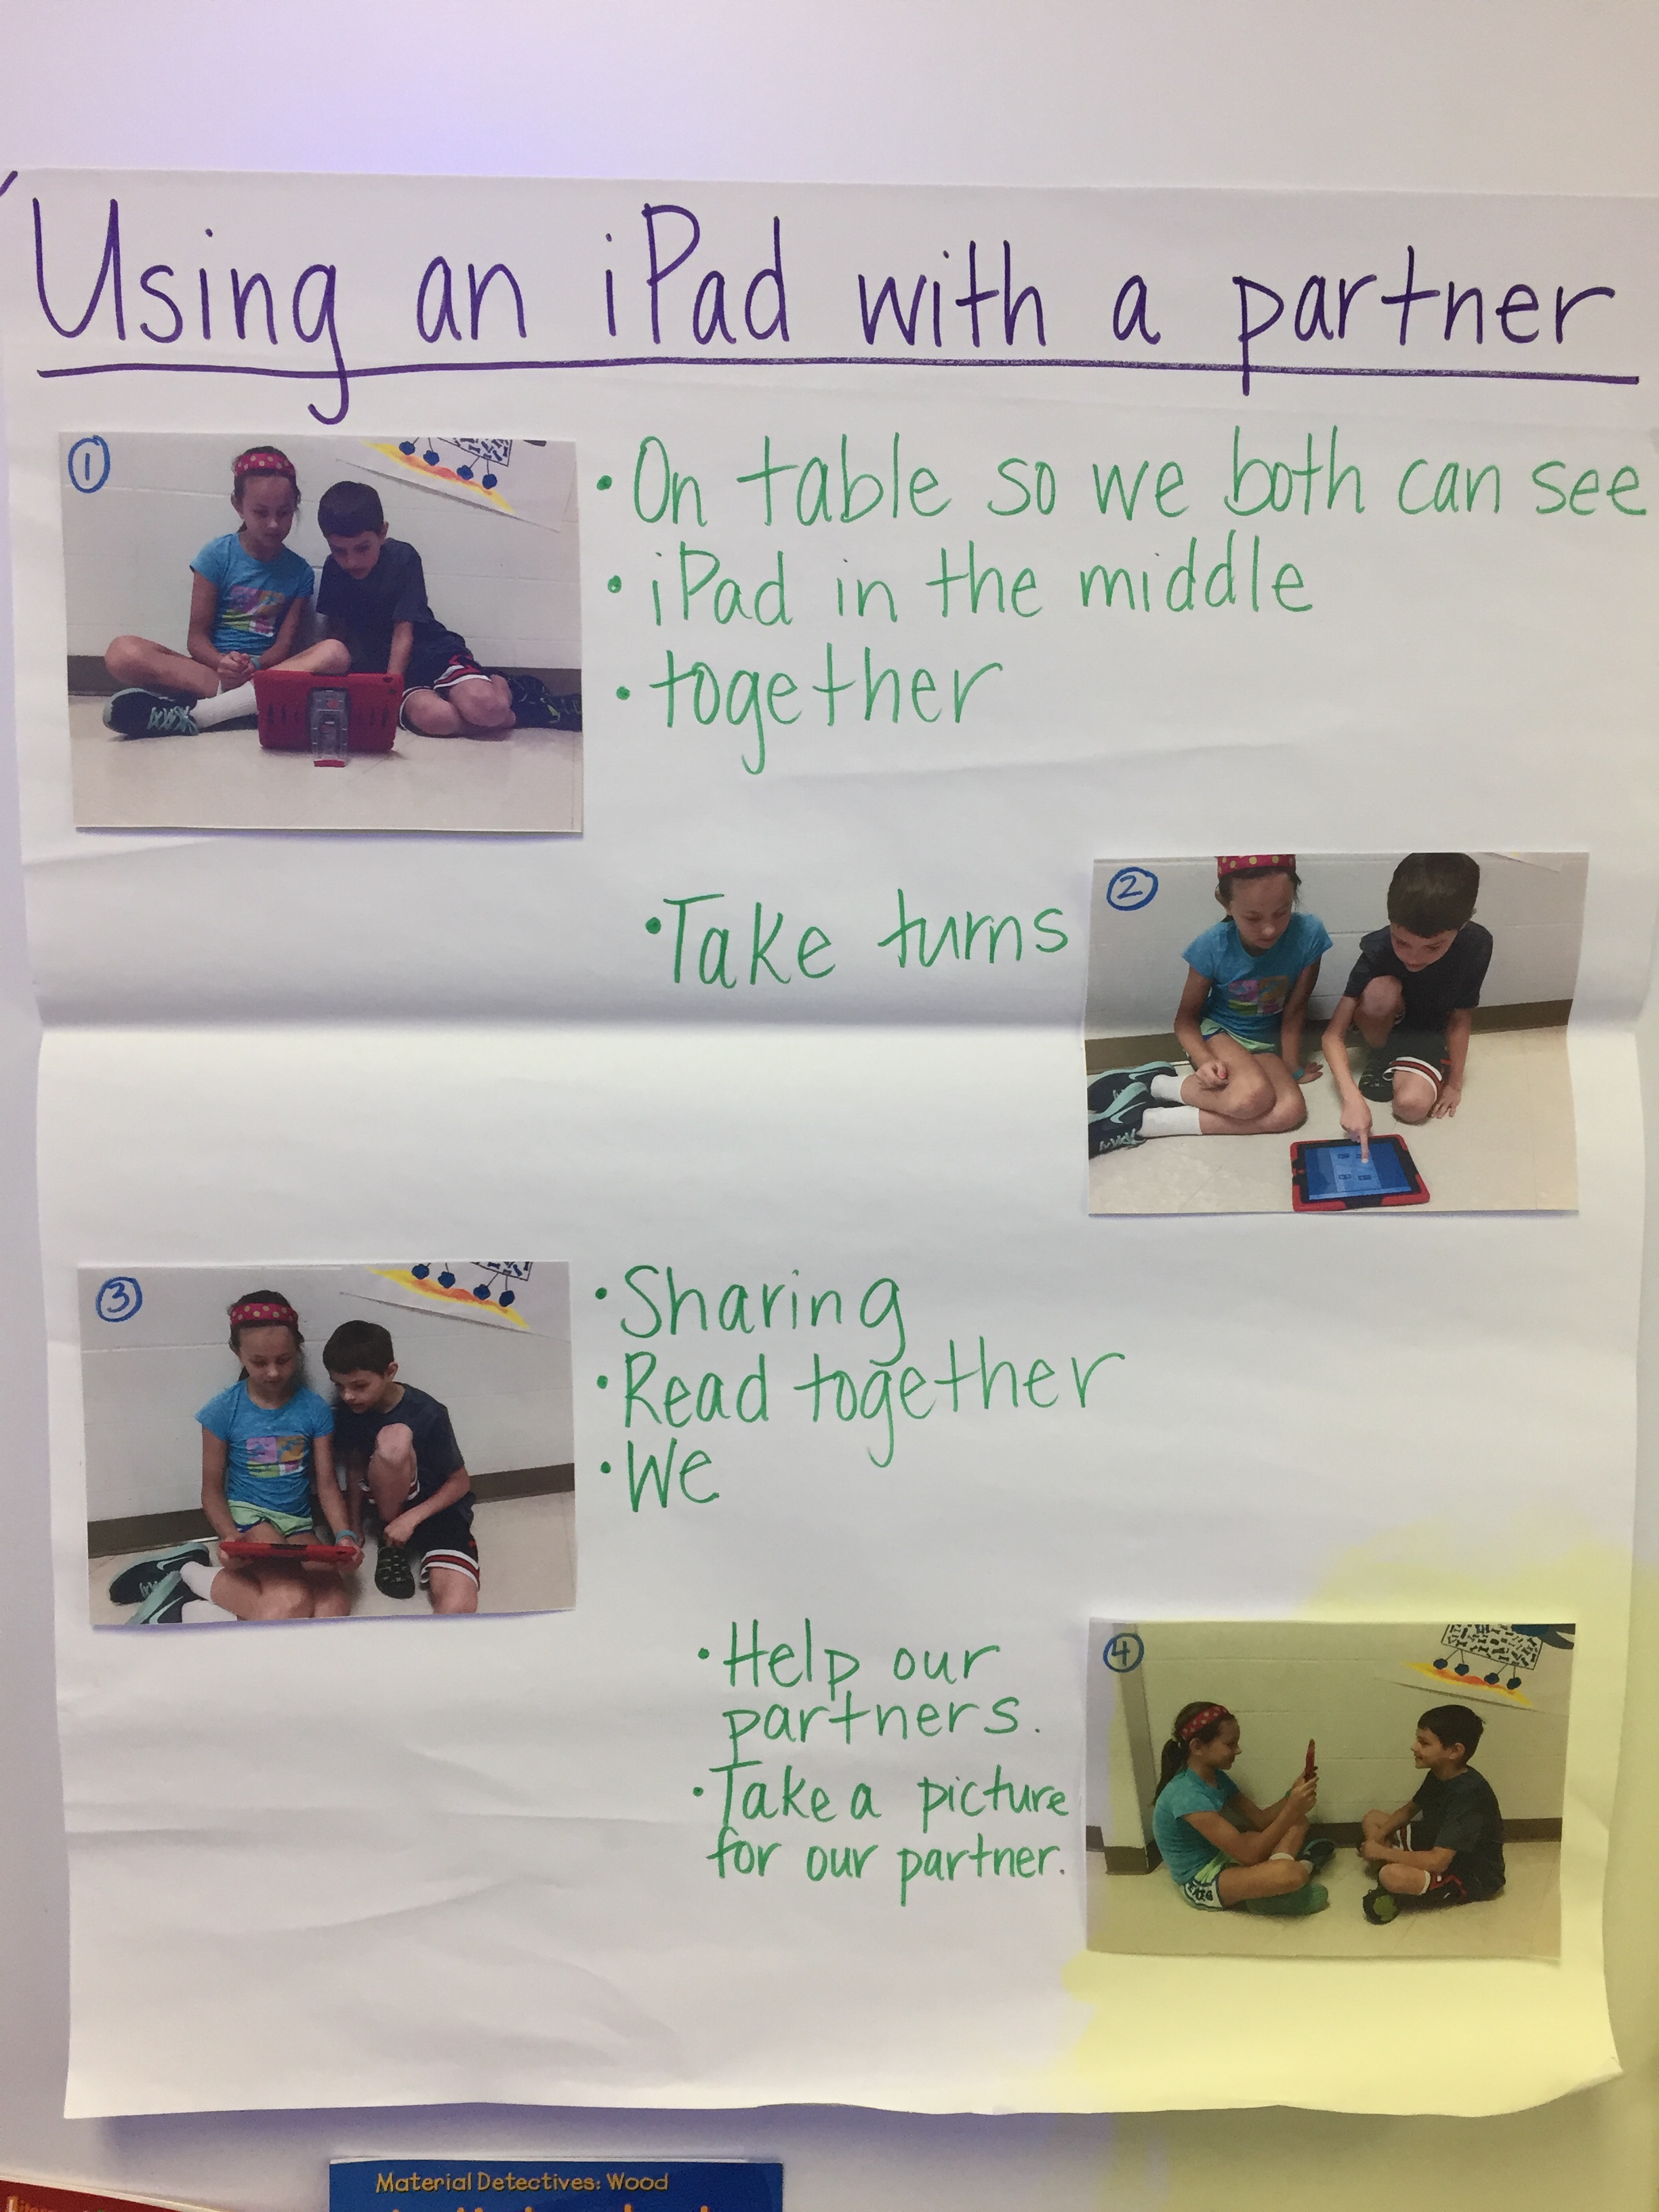
We’ve been noticing over the past four days that our kindergarten friends are so excited to work on their devices that they are forgetting the basic rules of working with a friend kindly. Sometimes it’s just instinct for a five or six-year-old to grab an iPad from their partner and hurt a heart along the way so we felt like today was the day to bring back some reminders about collaborating on our devices.

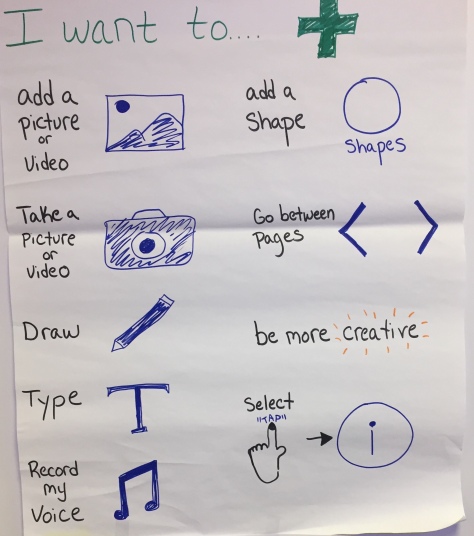
We started with an anchor chart with three strategies for working together:
FullSizeRender (1).jpg

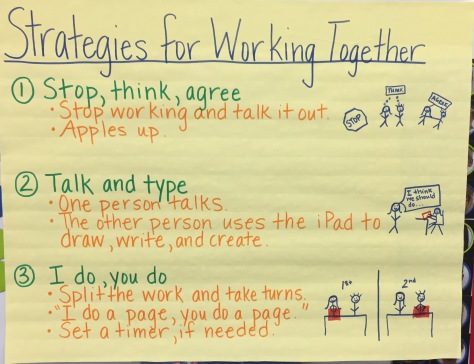
We shared each strategy and then provided some dramatic interpretation of the strategy, performed by me and Katie. While the kids were quick to point out that we weren’t actually making a book on our screen during our performance, they were also quick to pick out that we were being kind, making compromises, and sharing. Before leaving the rug, each set of partners chose a strategy for working together and then head out to their iPads to get started.

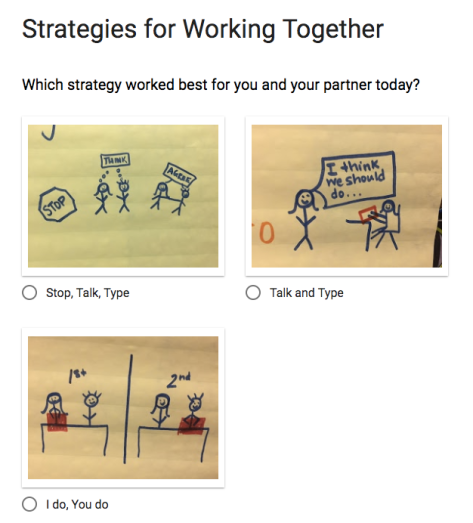
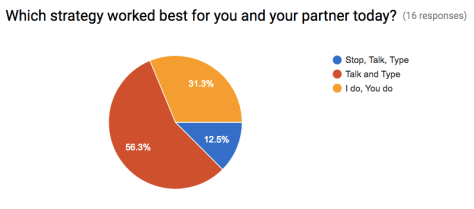
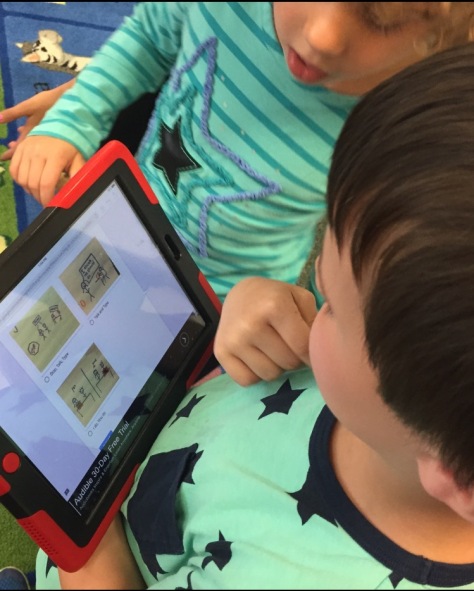
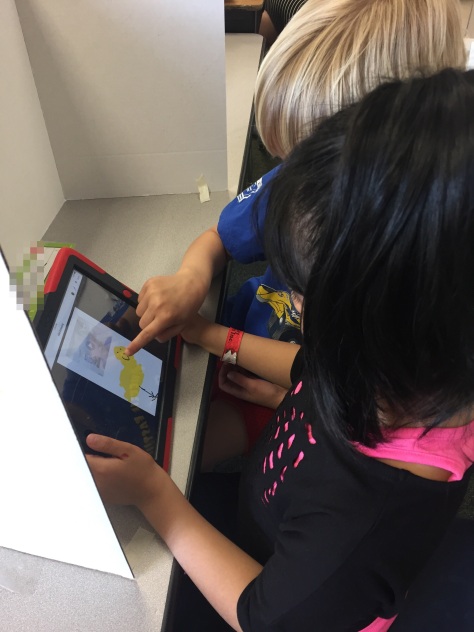
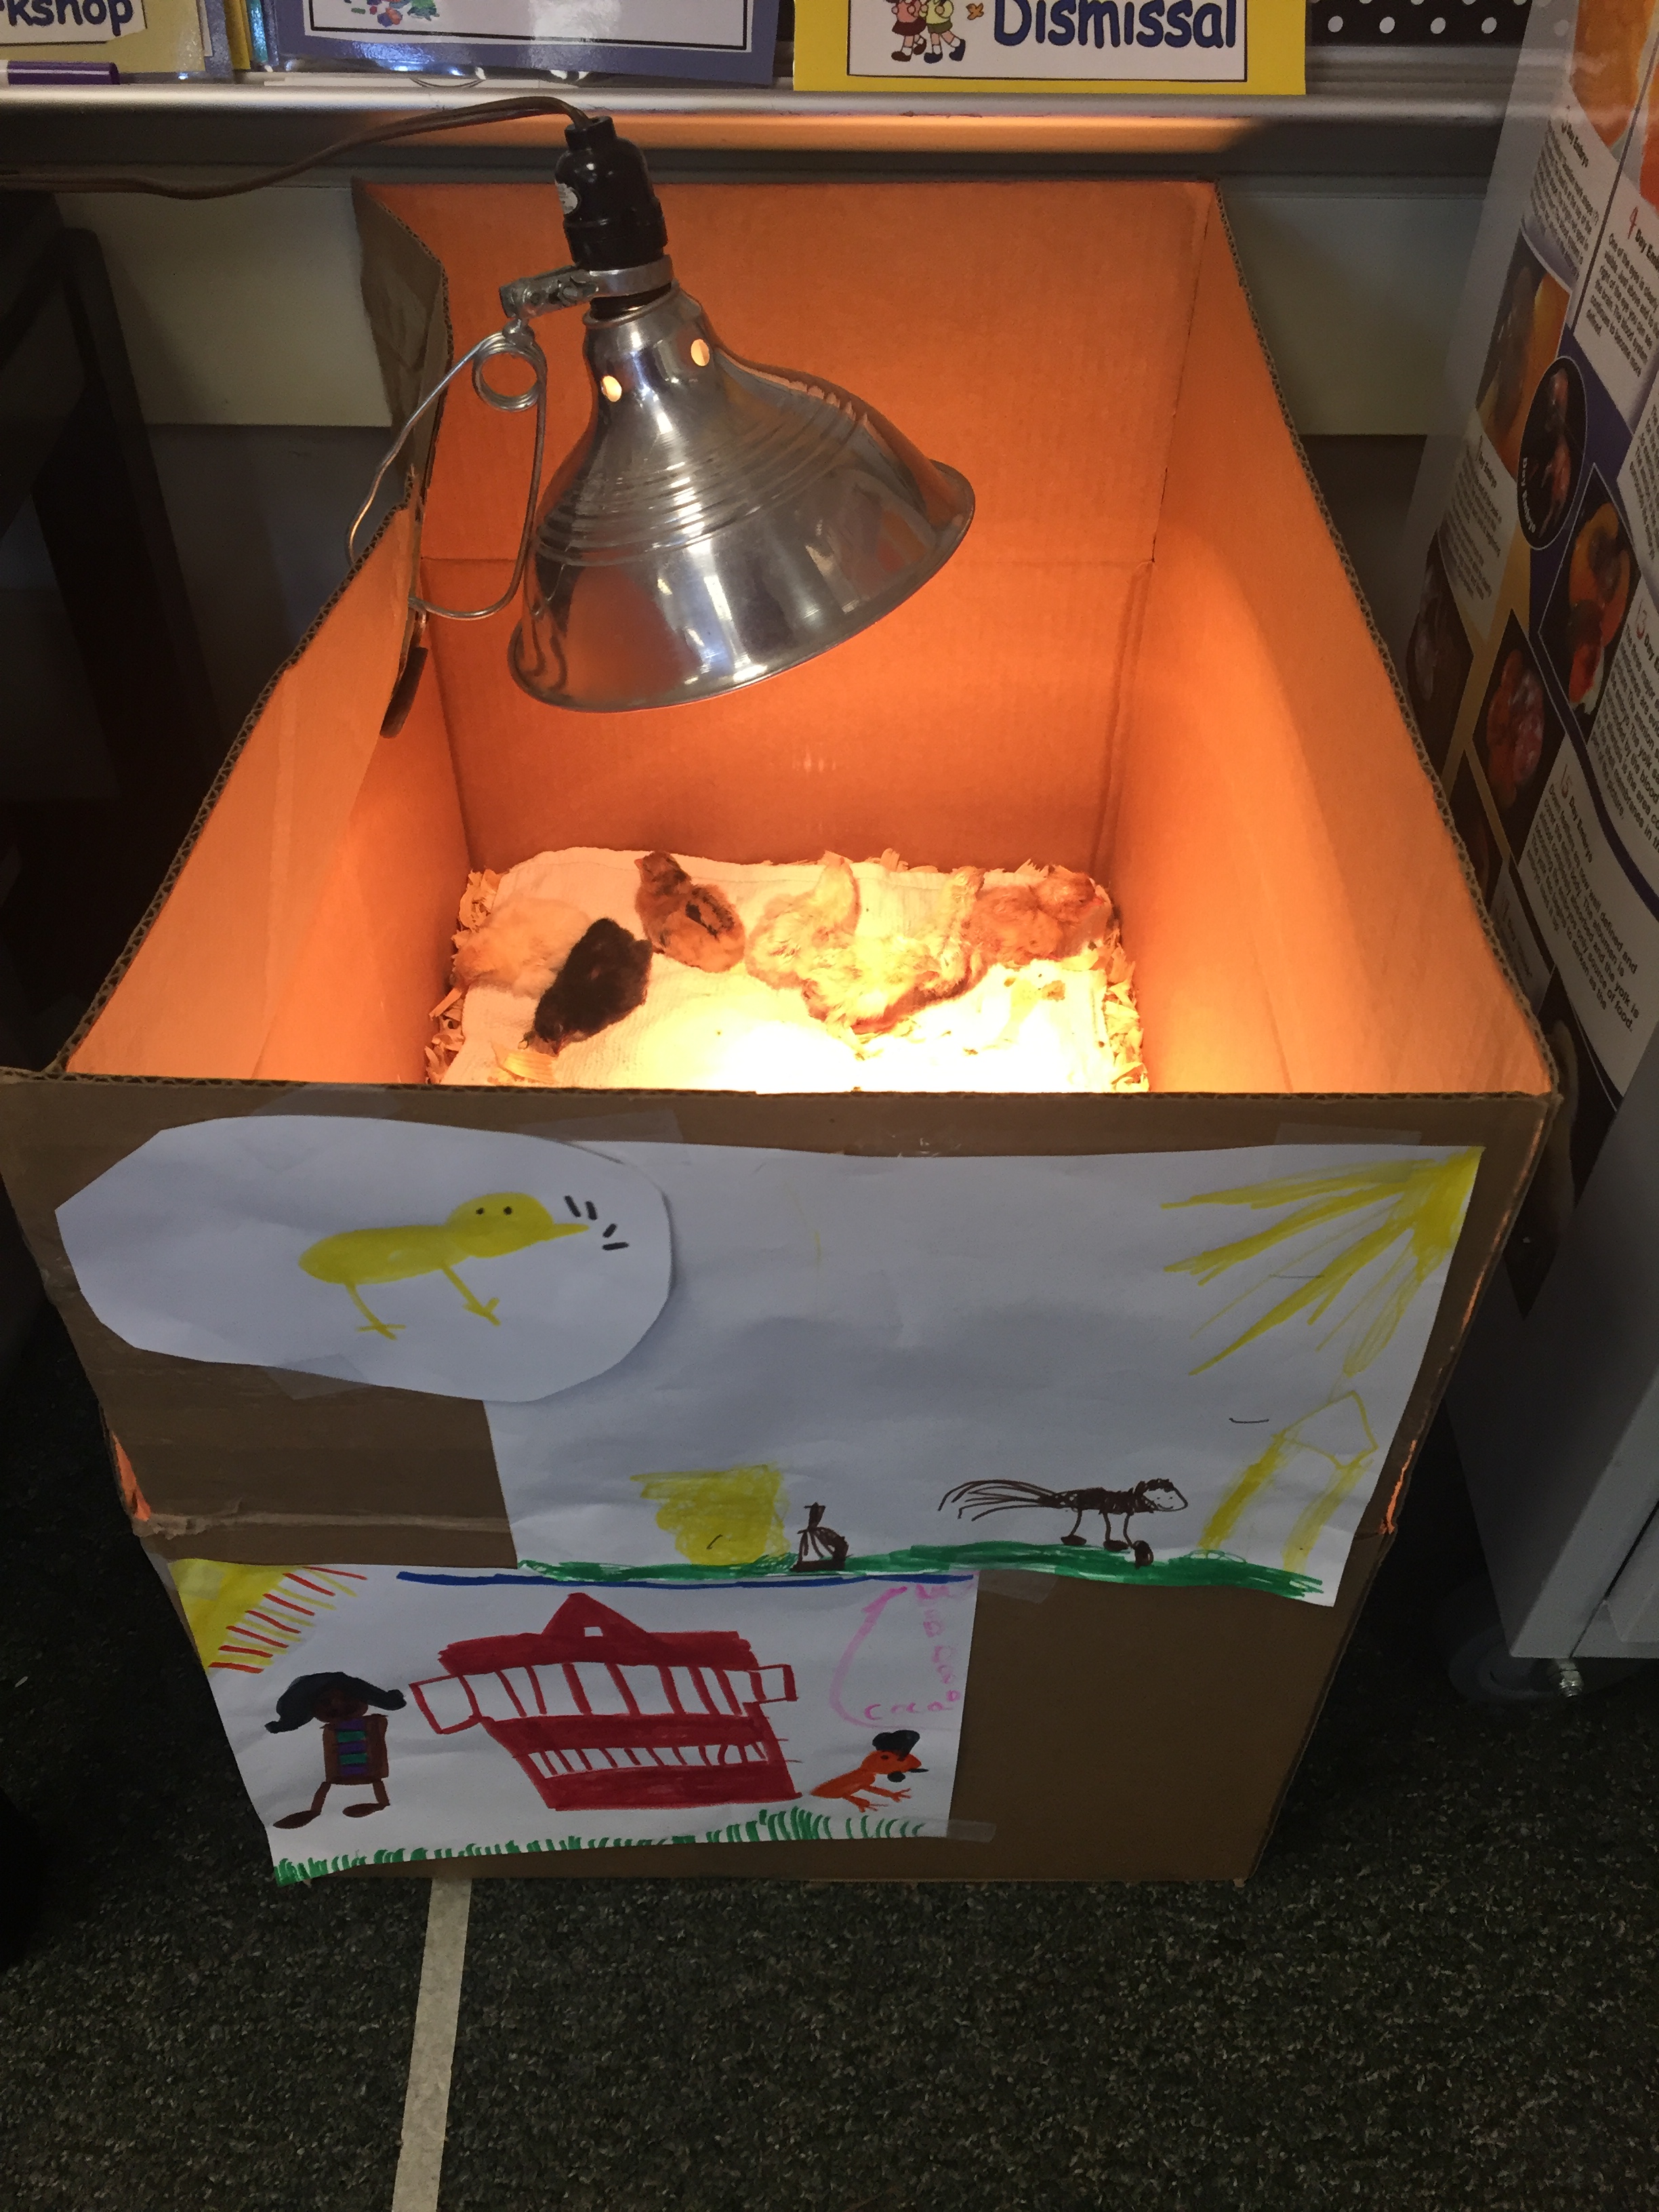
The students found so much value in their work today. Their partnerships created a system of checks and balances that provided some needed accountability in this process. They identified the features of their science books that were missing because they were focused on what they would do when it was their turn. Also, Katie stopped them for a mid workshop teaching point to share her own science book about chicks. This check-in prompted the students to push their own thinking by adding audio buttons when they couldn’t express themselves effectively enough through writing, and to vary the size and quantity of photos for different purposes. To wrap up, we had kids complete a short Google Form to reflect on their work and choose the working together strategy that was their favorite using the stick figures from our anchor chart. So far, they like “talk & type” the most.

Screen Shot 2017-04-28 at 3.45.35 PM.png

Screen Shot 2017-04-28 at 3.45.04 PM.png

My super favorite part was when some little guys who struggled earlier this week with partner work found comfort in the structures provided. The “stop, think, agree” strategy gave them the right to say, “We are arguing too much and we should stop touching our iPad and talk it out.” The “talk & type” strategy gave them permission to speak up to help with spelling and creativity. The “I do, you do” strategy gave them each a chance to have their voice heard 100% without the partner squashing their thoughts.

We’re going home this weekend feeling like a million dollars. P.S. Kindergarten teachers deserve a triple salary, a personal massage therapist, and bottomless Starbucks.IMG_5184.JPG

FullSizeRender 2 (1).jpg

Days 3 & 4: Interview A Friend


This is the fourth post in a series about launching the use of the app Book Creator in a kindergarten classroom.  You can read the first three posts by clicking on the links below.

During planning we thought that a great way to get the kids going would be to have them interview each other.  We wanted them to have an opportunity to talk about and connect with learning that they were already doing and to share some questions they had.  This was also a way to get them into book creator before their was much action with the chicks.

Day 3

I did a simple illustrated chart to try and support their efforts.  We discussed a few guidelines for contents and agreed that each student should say three things they knew about chicks and one to two things they wondered.  Our send off directions were “Think, Practice, Record,” and we chanted it a few times together before partners went off to their working spaces.  We also discussed what it meant to be professional so that they could elevate the quality of their work.

The recording was a bit bumpy at first as it was the first time they had recorded another student.  They found themselves rerecording a lot because their initial attempt was too quiet or focused on someone’s feet.

IMG_5515.JPG
This is my terrible chart.  Luckily Kindergartners are very forgiving.

The most exciting part of Day 3 was that one of the eggs started to crack!  The students gathered close looking at the crack and trying to take a picture for their book.

IMG_5525.JPG
The first egg begins to hatch
IMG_5586
Students work as a team to edit a page in their book.

Day 4

Several students still needed to record by day 4 and we also wanted them to go back and look at their work to see if they had done what we had decided on.  Laura typed up this little editing checklist for teams to use as they went back and reviewed their videos.  Many students found that they had said three things they knew but forgot to share a wonder.  To avoid frustration we suggested they just make a second video on their page with their questions.  This was also a helpful strategy for students who were struggling to get the whole thing done in one sitting.

IMG_5556.JPG
A checklist for video revision.

By the end of day 4 most students had completed their videos, revised their covers, and were excited to see that some of the chicks had hatched!  Just in time for us to get some content for our book.

IMG_5558.JPG
The first hatched chicks!  Complete with decorations for the box.

We identified two areas to go next; partner work and content.  Partner skills were getting rusty at this point and we found ourselves mediating a lot of disagreements.  On the other hand we also felt like it was important that they begin to use their knowledge of nonfiction features to get some meaty content in their books.  We discussed it with the teachers and they agreed that the social stuff needed to come first.  So we were left wondering…what strategies could kindergartners use to help them work together?

Come back tomorrow for a guest post by Laura Meehan, iDal Coach and my daily work buddy.  She will be blogging about Day 5: Strategies for Working Together.

Day 2: Create a Cover

This is the second post in a series about launching the use of the app Book Creator in a kindergarten classroom.  You an read the first two posts by clicking on the links below.

We had a lot that we wanted to teach kids today and perhaps we tried to take on too much-but each of the micro lessons we taught seemed so essential!  We ended up breaking it down into three charts.

First….review the most important icons from book creator.  This was a chart we created ahead of time and used simply to review things that kids had discovered the day before.  I ran through it quickly asking kids to give a thumbs up for each item they had used the day before and look around so they could see who might be a specialist in the room. We guided students to refer back to it as needed during the creation time and it was very helpful for a few kids who had not been there for yesterday’s lesson.

IMG_5467.JPG

Next and probably MOST IMPORTANT…Establish explicit guidelines for HOW to work on a book with a partner.  This was a really vital collaboration and social emotional lesson that needed to be done up front so that their time together could be kind, helpful, and productive.

Laura and I went back and forth about this chart during the morning.  She ended up “winning” and we used photos of kids in action instead of doing the drawings ourselves.  A few willing students from an older grade helped out.  We co-created this chart with the class as they noticed what they saw the students doing in the photos and talked through what this might look like.

Reflection: Most of our friends did really, really well with this today.  A testament to the great instruction they’ve been getting all year, the value of explicit guidelines in how to collaborate, and the importance of thoughtful pairing.  A few friends struggled and I wondered about other strategies we might use in this scenerio to help.

IMG_5468.JPG

The task…Create a book cover for your informational book about chicks.  We took a quick look at some mentor covers before heading off to do work.  Students identified that we needed to include a picture, the title, and their names.  I hung a small page I had made as a digital reminder on the bottom of the chart.  We had intended for students to be given a copy of this at their tables and then it didn’t happen, I wished that it had.  It would have been helpful to have a visual reminder of their three tasks as some groups went down the rabbit hole of drawing and started to run out of time.  You can visit this link to view the document I created.

Screen Shot 2017-04-18 at 3.47.33 PM.png

Screen Shot 2017-04-18 at 3.47.42 PM.png

Like I mentioned.  It was a lot to take in, but they rose to the challenge and most groups were able to create their covers, play with some features of the app, and demonstrate thoughtful partner skills as they worked.  I am continually impressed and amazed with the thoughtful energy that Kinder kids give to their work.  #powertothelittlepeople

I’ve Been to the Other Side

Have you ever watched a presenter and thought to yourself, yes that’s a great idea BUT… What follows is never good.  Fill in the blank; not with my students, I don’t have time, we don’t have devices. When I present I love to show real work from the classroom.  Students in action, photos, student work, and videos that kids have made.  I select these carefully to represent students of all learning abilities.  I never show just the “smartest” students.  That’s not authentic.  Yet there has never been a time when I haven’t looked at evaluations and seen the accusing phrase that goes something like “but my students are English Language Learners, or have IEP’s, or are low income.”  My students were all of these things.  The work you saw, the clips you viewed were low income students and students with IEPs, students with no label who still struggled, students somewhere in the middle, and yes sometimes the more accomplished.  I’m not kidding I’m really not.  


But that’s not why I’m writing this post.  I’m writing because I want to address the other comment.   The comment that went something like “How can I do this without 1 to 1 iPads?”  These comments were much more prevalent.  They were from naysayers to teachers who really did want to start tomorrow but just couldn’t wrap their minds around how to make it work with what they had.  I’m writing this post to tell you I’ve been to the other side.


Last year I left my classroom, 30 ipads, and ten years worth of books and furniture grants to a very lovely teacher.  Now my job is to coach people in literacy and technology and lots of things in between.  Next year they will all have iPads but this year…yuck.  Shared carts of old netbooks that take forever to boot up and even longer to log in.  Missing keys, odd trackpads, unfamiliar programs.  No shiny iPads, no quick fixes.  I’m living in the other side.  I’ve seen your BUT. I get it.


And yes it’s hard, it’s challenging some days and sometimes I see in the eyes of teachers that they want to give up and go back.  But then they see their students light up and give a little more, and help each other out, and do something amazing. Then they learn something new and feel that spark, that fire again! I’ve been to the other side and we aren’t letting it stop us.  We can do it!  You can do it!  Let’s just try.

iPad Friends for Early Learners

Screen Shot 2016-04-25 at 2.55.03 PM
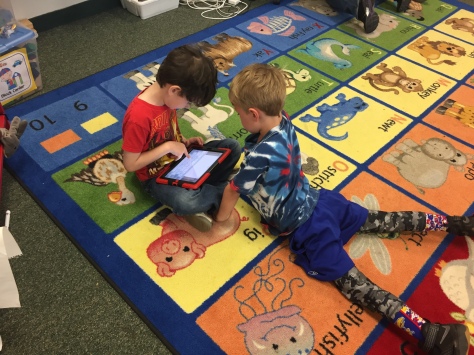
How do we ensure that our littlest learners are equipped to use technology in a meaningful way?  We go slow to go fast!  I’m very pleased to share this document with you, created by myself and a group of fellow instructional digital age learning coaches. (kindred spirits, overall geniuses, and great people)

The concept came to use as we were working on another document to help teachers roll out the year.  Where were the lessons for our youngest learners?  Hey, these are people who need to learn how to sit on the carpet.  Giving them a $600 device takes a little preparation.  So iPad Friends was born.  A short sweet document with a teaching point and an image of a student modeling.  Our hope is that teachers will take the teaching point and make it their own, then take a photo of their own students modeling these great habits.

Please share, enjoy, and make it your own.

iPadFriends


Tweets As A Nonfiction Text Feature

Earlier today I was looking for resources on extreme weather for one of my teacher teams and stumbled on this article.  Below is a screenshot or you can click the link to read the entire thing.

Screen Shot 2015-11-10 at 1.47.19 PM

It gave me pause for thought because it’s peppered with embedded Tweets like the one in the image below.  Now this is nothing new to me as an adult reader and a Twitter user.  But I wondered how many students would recognize this new type of nonfiction text feature and know how to approach it.  What might we want students to consider when they encounter an embedded tweet in an article?

Perhaps that there has been a shift in author?  Therefore a possible shift in validity.

How do we look at the source and decide if it’s reputable?  Is this an expert in the field like a weather person?  Is this someone who is giving us a “from the scene” perspective?

What image literacy skills might students need to interpret, connect, and synthesize the tweets with the body of the article?

We’d love for you to share your experiences if you’ve tried using any articles with embedded tweets with your students.

The Value of Screencasting

Building on our recent digital artifacts discussion I thought we might take a minute to look at the value of using screen casting in the classroom.  When I first learned about screen casting my initial thought was “what a great tool to use in math!”  I began to create quick tutorials for students to help them learn concepts and strategies.  These were shared on our website so that any student (or parent) who needed to could access them.  I would use QR codes on class charts to provide quick access to certain tutorials and make the charts come alive.  And all of these things were great, but…

I was starting to feel like my own little Khan academy.  Sure it was personalized to our curriculum and the learning we were doing directly in class.  But I  couldn’t shake the nagging feeling that this was a tool that should be in the hands of STUDENTS!

You see, unless you can sit and watch kids solve and think through problems there are essential pieces of information that you miss.  I would look at papers and see erasure marks, sometimes down to holes in the paper, and wonder what process had taken place to get the student to the end goal.  Where was their understanding breaking down?   If they caught a mistake in their process how and why and when?  I thought perhaps if I could get them screen casting that I would have answers to these questions and I could be a better math teacher.  In the end, I was right.

Let’s look at an example of a screen cast from a former student of mine.  In this screencast she is doing something that we call an “interactive” screencast.  This is where the student is creating the screen cast for an audience and is tasked with engaging the audience to solve the problem, then provide an explanation as to the correct answer.  It’s one of the many formats we brainstormed as a class so that students understood that screen casting is not just a digital quiz to be turned into the teacher, but that we often have different purposes and audiences for creating them.

As you watch think:

  • What does this student already know?  What is she able to do?
  • What questions do you have about her process?  What do you assume she had done mentally that we don’t see?
  • What evidence do you see that she understands the concept?  At what level does she understand it?  (Is there evidence that her understanding goes beyond just being able to apply an algorithm?)
  • What feedback would you give this student about her screencast?  About her math process?
  • What are some next steps for this student?

We’d love for you to share your thoughts in the comments!


Making Digital Artifacts Work: Part 3

Processed with Rookie

This is the third post in a series about making digital artifacts of student learning work for you as a teacher.  In this series we will discuss the types of digital artifacts we collect, how we manage them, and what to do with all of those great pieces of evidence of student learning.  You can read the first post in this series here and the second post on ideas for managing artifacts here.

We’ve been exploring using digital artifacts in the classroom.  So here are three simple ideas for getting your students started with digital artifacts tomorrow!

  1. Snapshot and Reflection: Ask students to take a picture of a work product that you would like to have them reflect on.  Then incorporate this into a reflection artifact by annotating directly on the image  (Skitch) or adding some writing (Pages/Keynote/Google Drive) or spoken reflection (Sonic Pics).  Students might save this and add to it over the course of a unit or during the week.  Or perhaps they share with you immediately for a goal setting conference.
  2. Video Reflection: Using a built in recording program and camera ask students to stop by the reflection book and share something they learned today.  If you have multiple devices students can work on a rotating basis.  If you only have one then set up a quick recording booth and have students cycle through during the day or week.  You might ask them to talk for two minutes about how they applied a reading strategy during independent reading, reflect on their observations from a science experiment, or share a portion of writing where they accomplished a goal.
  3. Padlet Exit Ticket: You know we couldn’t leave Padlet out of this one!  It’s such an easy and versatile tool.  Ask kids to take a few minutes to share a new piece of learning, lingering question, or even record a quick video right into the padlet.  You can guide students with a specific question or leave it more open ended.

We’d love to continue in this series.  But what questions do YOU have?  Leave us a question or burning issue in the comments and we’ll work your needs into our next post.  : ) 

Making Digital Artifacts Work: Part 2

This is the second post in a series about making digital artifacts of student learning work for you as a teacher.  In this series we will discuss the types of digital artifacts we collect, how we manage them, and what to do with all of those great pieces of evidence of student learning.  You can read the first post in this series here.

IMG_1226
A student uses Pic Collage to share their top ten favorite books with classmates and Twitter buddies.

What do I do with all of these digital work samples!?!?!

Unless you are an organizational wizard you probably already have some stacks of papers collecting in a basket or on a table somewhere.  It’s only September!  Digital artifacts are fantastic but what can we do when we have an inbox full of video responses to view instead of a stack of written responses to read?  Digital artifacts can and will often take more time to review, especially at the beginning when you are thoughtfully thinking through how you want to integrate them.  However, you don’t have to give up all of your time to devote to these artifacts.

  1. Impose time limits: Students can and will record a five to ten minute video if you let them.  Teaching kids how to create a media response is key.  We model for them, demonstrate how to plan (or not in some cases) and show how we are mindful of time. In the example below we see a student’s third attempt at creating a short and to the point video that captured her most essential questions from a short video the class had watched.  The process of limiting herself forced her to narrow her thinking to the most essential pieces to share with the teacher and class.  Additional questions were kept in her notebook and revisited when time allowed.
  1. Reflect on the task: If students are struggling with time limits we sit back and reflect on the task that we’ve asked them to complete.  What did we hope to accomplish?  What did we hope that students would learn or demonstrate?  I’ve left more than one class session thinking “that should have been done in 20 minutes, why did it take 50 and some kids still need more time?”  There is a time and a place for using technology as a reflective tool.  As you learn more about how and why you want to use these strategies reflect, reflect, reflect.  What opportunities provide the most information for you and benefit to students.
  2. Spot Check: Lucy Calkins once said that if she was able to sit down and read everything that her students wrote then they weren’t writing enough.  I will confess.  I do not always look at every single video, every single time.  There are situations in which we might spot check the class for overall understanding or focus in on a core group of students who we identified as possibly needing more support during a conference or lesson.  Yes you want to try and look at as much student work as possible, but you also have to be realistic.
  3. Engage Students in Self & Peer-Reflection: We teach students self reflection skills and partner feedback skills to help support kids when we can’t always be present.  This feedback is an essential part of the learning cycle as they work with and support each other on everything from giving effective video book talks to math strategies used in a screencast.

    A student uses a photo annotating app to self-reflect using a checklist the class brainstormed together on the whiteboard.
    A student uses a photo annotating app to self-reflect using a checklist the class brainstormed together on the whiteboard.

We all know teaching is a balancing act.  Hopefully, at the end of the day, we can find a system that works well for us and our students.  Remember, kids need to own the learning.  So teaching them to take on part of these responsibilities is both effective for you and them!

Check back next week for our next post in this series.  Three ideas for digital artifacts you can try tomorrow!

Making Digital Artifacts Work: Part 1

This is the first post in a series about making digital artifacts of student learning work for you as a teacher.  In this series we will discuss the types of digital artifacts we collect, how we manage them, and what to do with all of those great pieces of evidence of student learning.

A student shares important elements of their book club book using a digital tool

What is a digital artifact?

Digital artifacts can be photos, notes, student projects, blog posts, Tweets and just about anything that students create using digital tools.  They comprise a mixture of student created and teacher documented artifacts of learning over the course of the year.

Digital artifacts are great supplements, in some cases replacements, to traditional artifacts that we collect in the classroom because they add elements that we wouldn’t have otherwise been able to capture.  For example, teachers often collect student notebooks to read through writing, gather evidence about skills learned and applied, and check on the sheer volume of work that kids are doing.  Digital artifacts can add student voice and reflection to this.

Instead of attempting to confer with every kid we can capture their voices and thinking through the use of technology tools.  We can ask kids to create reflection presentations or portfolios of digital work using screen shots and simple apps like Keynote, SonicPics, or iMovie.  Essentially digital artifacts give us more information than we have ever had about our learners.

We capture snapshots of kids at work and use these to make our record keeping rich and reflective.

How do I begin collecting digital artifacts?

I like to the start the year with something simple like capturing photos of students at work and a few notes about the photo in my Evernote account.  A notebook for each student holds these notes, snippets of conversations, and other work samples over the course of the year.  This is a tool for me to learn more about my kids and to use for reflection when planning.

Figure 5.11
This anchor chart appears in our new book Amplify: Digital Teaching and Learning in the the K-5 Classroom

With students it’s important to discuss what archiving is. We give kids examples of the types of work they might want to collect over time.  We discuss how each of these items can be used for reflection on ourselves as learners.  We also make time for this process, reminding students at the end of a lesson to capture a snapshot of learning from the day or to tag a post with a special tag like “learning” or “archive” so that they can easily find it later.  At the end of a unit or quarter we set aside time to review these artifacts, reflect on learning and growth, set goals, and share with peers and parents.

What types of digital artifacts are the most important to collect?

Although going digital as a teacher has its benefits I believe that the most important artifacts are those that students have created.  These might be video diaries/blogs of students sharing learning, short projects or work samples, specific blog posts, exit tickets, or other student created work.

A student prepares images for an audio reflection on reading strategies.

We encourage students to collect a variety of samples across subject areas and those that best showcase their growth as a learner.  Times when they can pinpoint how, when, and why  they met goals and showed growth.

We empower kids by giving them the ownership over their learning and reflection process through these digital artifacts and set up structures to help students catapult themselves to success.  These structures include student checklists, goal setting sheets, and conferences.

A student shares a screenshot demonstrating their ability to model and use numbers to solve a math problem. This image is saved for reflection at the end of the unit.

Check back on Friday for our next post in this series on managing student digital artifacts.  We’ll talk about how to handle all of the new work that you have available to you.