Practical Amplification Series: The Lesson

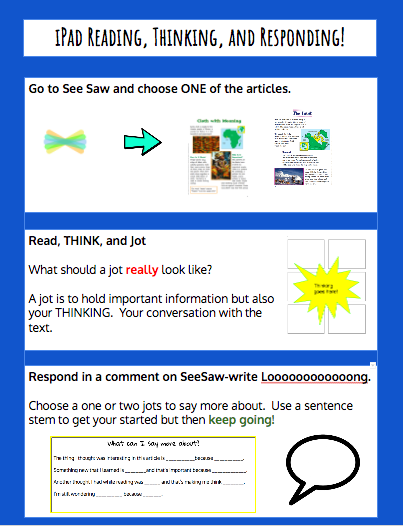
This is the fourth post in a short series about using SeeSaw as a tool to amplify classroom practice in order to help students meet instructional goals.  If you haven’t read the first three posts I recommend starting with the first one and working your way through!

IMG_4588.PNG

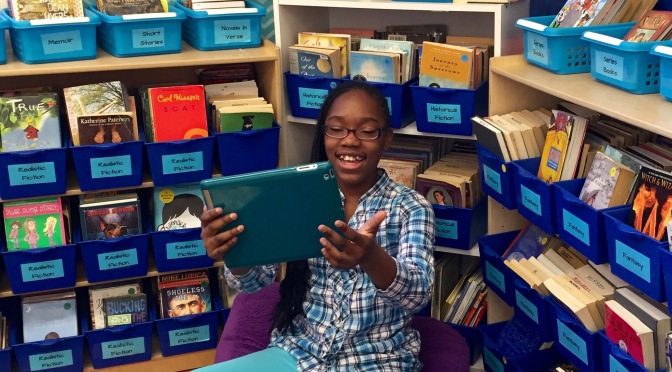
Today was the day!  We did it!  Digital reading, jotting our thinking, and trying to write long.  Instead of writing about the play by play I’ll organize my thoughts into things that worked well, things that I didn’t anticipate/need to address, and next steps.

Things that worked well

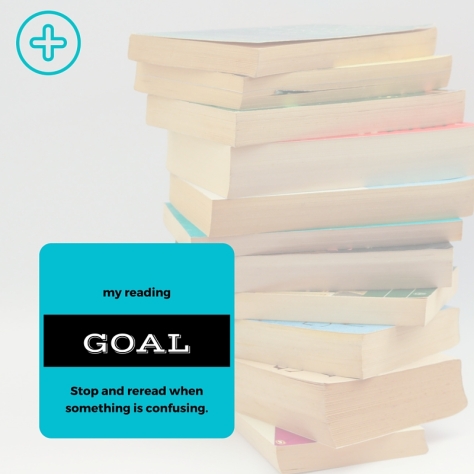
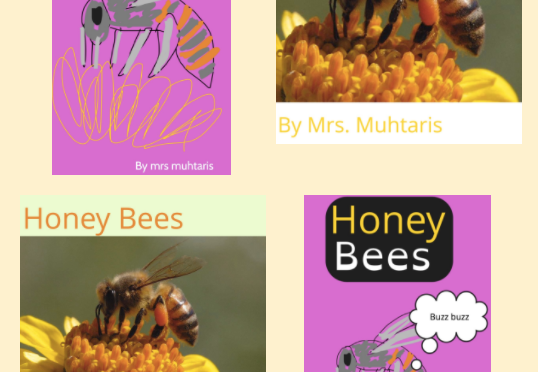
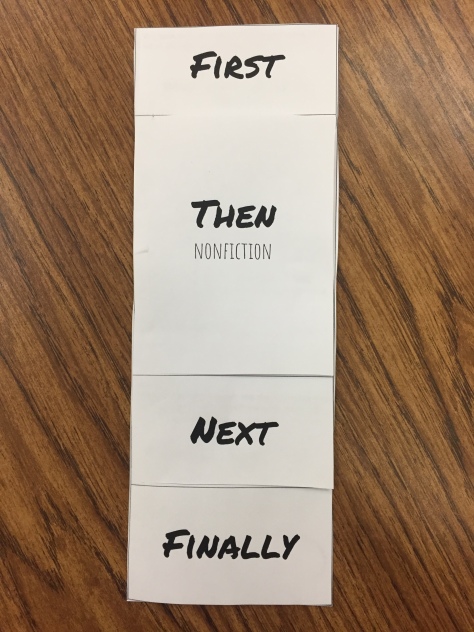
The Digital Anchor Chart: While I could have done this on paper, the kids seemed really interested in the digital chart and I saw several refer back to it during the lesson.  This is really more about the good instruction on how to use charts they’ve had from their teacher than it being digital.  However it seemed to work nicely and it gave me some food for thought as to how we might offer a way for kids to get back to digital charts and the uses of digital charts vs. paper charts.  But that sounds like an entire other series!

The Flow: Students responded well to the gradual release model, they were able to follow directions, and I didn’t have any of those teaching moments were I start tugging at my hair thinking “Why is this happening to me?!?”  I will say that I had to pull myself back and remember that I was working with second grade and not fifth grade, this is my struggle always!

fullsizerender-6Things I think worked well

The six box page:  This seemed like an easy to use tool for students, however I will need to get some feedback from the classroom teacher on how their use of this page compares to other ways that they jot their thinking. Most of them used the sentence stems to get themselves going and that was a goal of ours.  I’m not certain that I see evidence that they chose ONE to write a lot about.  However, I didn’t give them a clear strategy like marking or highlighting those items so that could have been improved.  Next time!

The other piece to that is that I’m not certain the text asked them to do the task I had in my head.  See below.

Things I didn’t anticipate/need to address

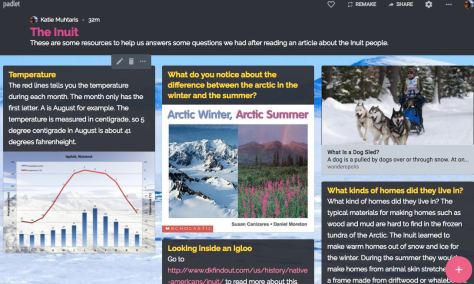
Kids don’t know diddly about the Inuit: Yeah, I should have seen that coming, rookie mistake.  I guess I chose the article in part because of that-I knew it would be high interest! However, the text inspired them to ask a lot of questions and so they had challenges writing long off any one idea because they had so many new ideas buzzing around.  And they did include many of these ideas.  So while they didn’t all do exactly what I was modeling they did accomplish writing a longer response and there was visible pride in the room at the sheer volume they were producing.  So maybe we work on volume and then massage the quality?

This also presents a great opportunity to build a quick text set for the kids to look at during independent reading and address some of their questions.  Which I did by tossing a few resources on a Padlet and checking out a few books from the school library.

screen-shot-2017-02-09-at-11-22-32-am

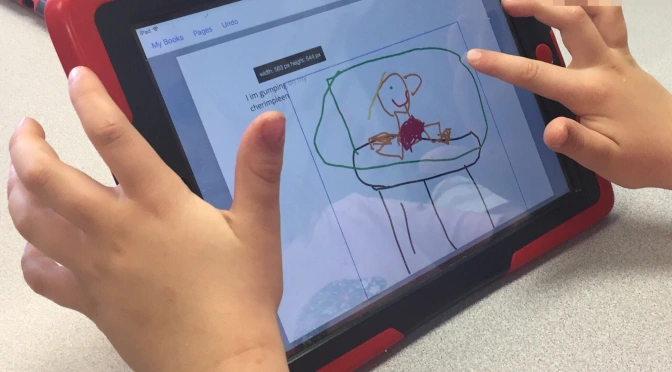
The typing…Oy Vey!: I’ve been able to witness in action how long it takes for kids to type their thinking out.  I’m super conflicted about it.  Of course they need to practice to get better and writing about reading is an important skill-one that it’s a huge plus to have the authentic digital audience to.  On the other hand we have to miserly about giving up any minutes spent reading.  A few things we discussed to address this;

  • Balance; sometimes kids type, handwrite, audio record, or video record.  They can also play with the speech to text function.  Although anyone who has ever read a text message by me knows the pitfalls of that.
  • Sending it home; we discussed how we might ask kids to do some of this work at home, with some education for parents as to how to coach and not correct.  This way we might redefine some homework tasks and give kids the opportunity to practice typing.
  • Practice App? Typing instruction, like handwriting, is a debated topic.  I’m not a fan of practice for practice sake.  However I’m going to tell you that I am a fast typer.  I mean fast, and accurate.  Granted I practice a lot, but I learned from the old Mavis Beacon typing tutor game.  So maybe I have an old fashioned bias for some rote practice in this area.  Granted just because it worked for me doesn’t mean it’s the right thing.  But I do think we need some more research in this area.  If anyone has any app they love I’m open to suggestions.  Must be AMAZING!

Next Steps

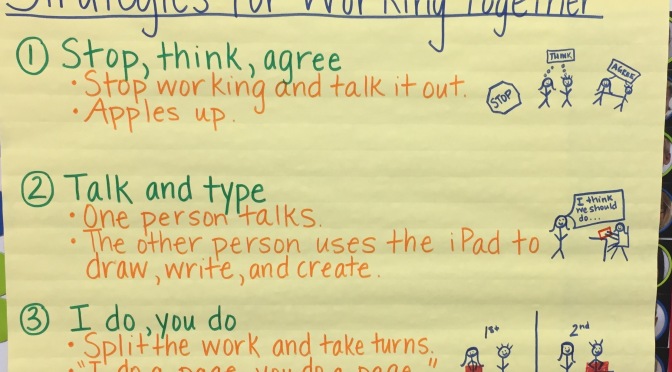
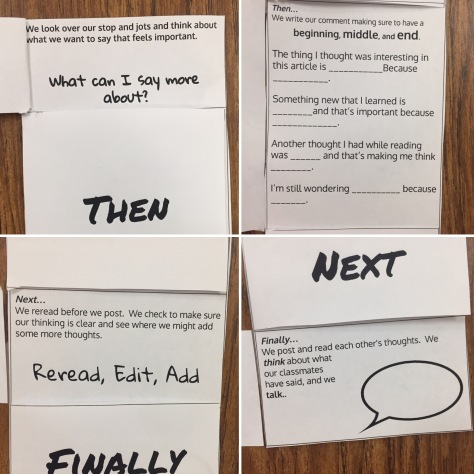
Revisit our goals, examine student work, plan based on needs: Sara and I were able to talk through some of what we noticed in the comments that students left and make some plans moving forward including; working on the thinking behind the writing to help kids know when they have more to say.  i.e. How do I know which thought it I could say more about?  And how do I do that? How do I say more about each type of jot I might make? Since Sara is starting a new read aloud next week we’re going to use that shared text to do some of that work with students.

For tomorrow we’ve decided to give kids time to explore more about this topic of Inuits and give them some space to answer their questions!


Practical Amplification Series: Planning for Instruction Part 2

This is the third post in a short series about using SeeSaw as a tool to amplify classroom practice in order to help students meet instructional goals.  You can read the first post here, and the second post here.

IMG_4578.PNG

I couldn’t stop thinking about my terrible bookmark tool all weekend.  I could spend several paragraphs critiquing it, but I won’t belabor the point.  That clunky bookmark is out and I’m keeping it simple.

One digital anchor chart to help students with the procedure and remind them of a key teaching point.  (This is where I had to go back and really ask myself “What is it that we want students to practice and apply in this lesson?  We want them to write about their thinking!)  Normally I build charts with students, however in some cases I prepare something ahead of time.  The digital format makes it easy to adjust to add student thoughts and ideas.

screen-shot-2017-02-08-at-2-44-50-pm
You can view the full size document of this chart by clicking on the image.

One sheet to hold thinking.  This is my six box sheet.  A very simple layout.  I added four more boxes on the back and the sentence stems from my original book mark. (shudder!)  I figured that was the most important scaffold and one that we have seen some students use with success.  I don’t know if this will help all kids or hold them back, but time will tell.

screen-shot-2017-02-08-at-2-32-02-pm
The front of the six box sheet.  This replaces sticky notes and is a little neater.  You can see the full document with the back by clicking on the image.


One digital tool-SeeSaw.  Students will access articles via SeeSaw and gather ideas into a comment underneath the article that they chose to read.  I like to offer several options for text so that students have some ownership and choice in the work they are going to do.

So I’m feeling a lot more prepared now that I’ve dumped my confusing tool!  Tools should help, not hinder kids.  Simple is often best!

So my instructional plan for tomorrow is going to be to use a gradual release model with some guided practice before releasing kids to do this work independently.  My goals are to;

  • Teach kids a simple, yet effective, procedure for reading and responding to digital texts.  This is to give kids more authentic work to do during workshop time, gather formative assessment data, and help them build stamina while the teacher works with small groups.

*Just as a note this isn’t the only tool we will put in their toolbox.  It’s the first of many.  But this tool and strategy meets our immediate goals based on what we are seeing kids can  do and where they need to go.

  • Continue to reinforce a series of lessons designed to boost students’ ability to capture their thinking about text and expand that thinking in a variety of mediums.


Please visit on Friday to see the outcome of this lesson, look at some student work with me, and think about where we can take these kiddos next!


Practical Amplification Series Post 2: Planning for Instruction and Customized Tools

This is the second post in a short series about using SeeSaw as a tool to amplify classroom practice in order to help students meet instructional goals.  You can read the first post here.

IMG_4445.PNG

Over the years we’ve learned that there are times for play and exploration and there are times when students need careful guidance.  The “right” way is usually a blend depending on your students, your tools, and what you’re trying to get accomplished.  But one thing is for sure, you’ve got to put your student hat on when trying out new things.

Those of you that have been using technology for awhile will probably find this process similar to one that you use before launching something with students.  Essentially, I dig in and play around looking for the most efficient, simplest route to get the job done.  Since this class already has SeeSaw up and running it was a natural choice for them.

Challenge #1: Get a digital article to the whole class.

I first played around with ways to share the digital articles.  The easiest route seems to be to post a shareable link to an article that I’ve put in a Google Drive folder.    For an online article this would work the same way.  I was able to do this very easily in See Saw.  I could also post a QR code, or Airdrop it to the kids.  However, since we will be using the comment function on my posted article- posting the link is the best way.  Challenge solved.

Challenge #2: Find a way for kids to capture their thinking while they work.

I explored a variety of options.  My best was to export the article to Notability, but it wouldn’t work for some reason and it seemed like a lot of steps.  I asked myself at this point;

How will kids annotating the article digitally be better than using paper and pencil?

I didn’t really have a good answer.  So I decided to just have students use a six box sticky sheet (a piece of paper with six sticky note sized boxes on it) to gather their thinking.  Truth be told. I think this will actually work better for students as they work to balance their thinking and writing.  Challenge sort of solved.

Challenge #3: Encourage students to develop their writing about reading skills by commenting on the digital article.

This challenge connects back to our overall goals of wanting to get kids writing more and writing longer, but in a meaningful way.  This is also where I’m going to need to come up with a strategy or custom tool to help.  The idea of custom tools and micro-progressions for learning has been on my mind a lot lately after reading Kate and Maggie’s DIY Literacy book.  So what do I know about these kiddos?

I know that students can write about their thinking when given support, encouragement, and accountability.

I know that the support they respond to best is visual and personalized.

Support: Their teacher has been using custom book marks with goals as a tool to help students remember what they are working on as readers.  I decided to stay within this framework and offer something similar in addition to an anchor chart.

This is my first attempt at a tool to use with students during our lessons next week. I’d like to say I had a fancy process for determining what to include but in reality I skulked around their classroom taking photos of anchor charts so that I could build on lessons they had already had this year.   I should say that I’ll be hoping for some additions from the kids and I’d like to update/replace these tools with their ideas and words going forward.  I also haven’t run this past their teacher yet so she will probably have some great insights as to how we could improve it.  And even as I’m posting it, I don’t love it.  It doesn’t feel personalized and it seems not so user friendly.  If you have suggestions for something better please leave a comment!  Help the children!

img_4455

img_4460

Encouragement & Accountability: The hope is that having an authentic audience will be a huge boost to both encouraging kids to up their game as well as hold them accountable.  But I’m also planning a mini-debrief with their reading partner to have some face to face feedback on what they did well and some reflection.

I guess I won’t know if we’ve met this challenge until we look at student work and reflect on the lesson.  Come on back on Friday to see how the lesson went, where we’re going next, and what we’ve learned.


Practical Amplification Series Post 1: Building Literacy Skills With SeeSaw

This is the first post in a short series about using a familiar digital tool (See Saw) in a new way with a group of second graders in order to help students meet instructional goals.

img_4444

This morning I spent some time exploring See Saw and thinking about how a group of second graders that I’m working with could do some more writing work with it.  (Thank you Sara for opening your classroom to do this work together!)

But first some background.

What we noticed: After a little digging we noticed a few things.  Students had built a lot of stamina to do this work since the beginning of the year, but weren’t able to sustain reading for as long as we’d like in order to confer and meet with small groups.    We also noticed after giving a small group of students an independent reading assessment by Jennifer Seravallo that we think now would be a good time to push kids to do some more intense work with their writing about reading.

Students can stop and jot, they are ready to capture more thinking and less jotting about the plot of the story.

Students can stop and jot about their thinking, they are ready to look for big ideas and start to write long from a sticky note.

Our Goal: Keep kids engaged with reading, thinking about reading, and writing about reading during the workshop.  Keep it interesting, authentic, and connected! No busywork.

Our Plan: Utilize digital tools to amplify the works students are doing in the following ways.

  • Offer more digital texts.  By giving kids a second reading task during the workshop we hope to inspire them to read more, engage with new topics, spiral back to strategies and skills, and get excited about new topics. (They are already doing partner reading mid-workshop but seem to be losing steam with this strategy, we need to pull some more from our toolbox.)
  • Offer digital texts in a way that kids can interact with.  Since the class is already using See Saw we noticed that it’s easy to share a digital text in PDF format with students in this way.  (We are using supplemental texts from the Primary Comprehension Toolkit.) While we would like kids to annotate digitally, none of the tools they are currently using supports this easily, so our plan is to have them stop and jot on a six sheet sticky note page (Harvey & Goudvis) and then use those stop and jots to write long in a comment.  This way kids have an audience of their peers for their work.
  • Use the digital tools to engage kids creative brains, build community around books, and infuse a little fun into our workshop. Because See Saw has some options to use photos with labels we can also have students add a quick three word book review to “sell” their longer writing to peers.  This also circles back to some lessons previously taught during the year.
  • Differentiate and Practice. One of the classroom teacher’s concerns with digital tools is the amount of time it takes kids to get something written down. This will provide the students with some good practice typing on their device, as well as offer differentiated tools like text to speech, and video recording.


Stay tuned for the next post in the series on planning for instruction and creating custom tools to help kids be independent!  

fullsizerender


I’ve Been to the Other Side

Have you ever watched a presenter and thought to yourself, yes that’s a great idea BUT… What follows is never good.  Fill in the blank; not with my students, I don’t have time, we don’t have devices. When I present I love to show real work from the classroom.  Students in action, photos, student work, and videos that kids have made.  I select these carefully to represent students of all learning abilities.  I never show just the “smartest” students.  That’s not authentic.  Yet there has never been a time when I haven’t looked at evaluations and seen the accusing phrase that goes something like “but my students are English Language Learners, or have IEP’s, or are low income.”  My students were all of these things.  The work you saw, the clips you viewed were low income students and students with IEPs, students with no label who still struggled, students somewhere in the middle, and yes sometimes the more accomplished.  I’m not kidding I’m really not.  


But that’s not why I’m writing this post.  I’m writing because I want to address the other comment.   The comment that went something like “How can I do this without 1 to 1 iPads?”  These comments were much more prevalent.  They were from naysayers to teachers who really did want to start tomorrow but just couldn’t wrap their minds around how to make it work with what they had.  I’m writing this post to tell you I’ve been to the other side.


Last year I left my classroom, 30 ipads, and ten years worth of books and furniture grants to a very lovely teacher.  Now my job is to coach people in literacy and technology and lots of things in between.  Next year they will all have iPads but this year…yuck.  Shared carts of old netbooks that take forever to boot up and even longer to log in.  Missing keys, odd trackpads, unfamiliar programs.  No shiny iPads, no quick fixes.  I’m living in the other side.  I’ve seen your BUT. I get it.


And yes it’s hard, it’s challenging some days and sometimes I see in the eyes of teachers that they want to give up and go back.  But then they see their students light up and give a little more, and help each other out, and do something amazing. Then they learn something new and feel that spark, that fire again! I’ve been to the other side and we aren’t letting it stop us.  We can do it!  You can do it!  Let’s just try.

iPad Friends for Early Learners

Screen Shot 2016-04-25 at 2.55.03 PMHow do we ensure that our littlest learners are equipped to use technology in a meaningful way?  We go slow to go fast!  I’m very pleased to share this document with you, created by myself and a group of fellow instructional digital age learning coaches. (kindred spirits, overall geniuses, and great people)

The concept came to use as we were working on another document to help teachers roll out the year.  Where were the lessons for our youngest learners?  Hey, these are people who need to learn how to sit on the carpet.  Giving them a $600 device takes a little preparation.  So iPad Friends was born.  A short sweet document with a teaching point and an image of a student modeling.  Our hope is that teachers will take the teaching point and make it their own, then take a photo of their own students modeling these great habits.

Please share, enjoy, and make it your own.

iPadFriends


Amplify Learning with Words and Images

TitleImage.jpgThis post first appeared as a guest post on the Educator Collaborative blog leading up to the Spring Gathering.  The archive of our free webinar can be viewed here! : )

image credit: https://unsplash.com/photos/jLwVAUtLOAQ

If you’ve ever logged into a social media site you’ve likely seen an image like this one. Perhaps it had a funny quip or thoughtful quote.  These images capture our attention due to their ability to stand out from the sea of words and noise and connect with us in some way.   I wondered what would happen if we leveraged these images and words to amplify the learning in our classrooms. How could we take this medium and make it work for kids?  What if?

What if we used these concise images as a way to remind students of goals or learning targets?  Better yet, what if students created their own reminders to help them be the best that they can be?  What if they acted as a class record of lessons throughout the unit? Perhaps these images become printed reminders of accomplishments or digital badges of success across the year? The potential is limitless.  Here are a few ways that I’ve begun to explore.


Social Emotional

Collaboration, teamwork, perseverance, risk taking, self-control.  Each of our students has unique ways that they can grow.  I’ve often noticed the school social worker giving little reminder cards to the students she works with.  But what if every student had one?  Perhaps they refer to their own little image tucked in their notebook before a book club meeting or group work.  If students have devices they might make this their lock screen.  These images can act as a quick reminder to breath when stressed, listen before they talk, or accept failure as a learning moment.  Students might also have a group one during collaborative work to help them with the skills they need to accomplish tasks  smoothly together.

SocialEmotional1.jpgimage credit: http://www.morguefile.com/archive/display/910393
SocialEmotional2.jpgimage credit: http://www.morguefile.com/archive/display/189442

Goal Setting

Over the years I’ve tried many ways to help students set and keep a record of goals.  While my systems have improved I still feel that students often forget these goals in the moment.  What if they created images like these and displayed them in a notebook or on their desk?  They might keep a photo roll on a device and pull it up by subject as the day goes on.  Making goals visual is an effective way to help us keep them at the forefront of our mind and achieve them.  Creating the visual; selecting an image, color scheme, and juxtaposition cements the goal for the child and makes it memorable.  Today’s tech tools coupled with a little guidance make this a quick and streamlined process.

GoalSetting.jpg

image credit: http://www.morguefile.com/archive/display/1002573


Micro Lessons

We might also use these visual reminders to serve as a vehicle for delivering micro lessons- remind students of prior teaching points, essential steps, or set a purpose for the day.  These class “goals” for learning can be displayed on a projector screen or smartboard at the beginning or end of class.  What if the class quickly helped compose one at the end of a lesson as a wrap up for the day? It might be a simple “today we learned…” statement or hold students’ words, reflections, and examples of great work of the day.  Or we might display a slideshow of visuals from recent lessons to play while students work independently or transition.  I keep photo albums for each subject in the photo app on my computer.  From there I can easily play one as a slideshow right from the app, no muss, no fuss.
MicroLessons.jpg

Image Credit: https://unsplash.com/photos/O1TNdLNvJLM

Reflection

Student reflection is an essential part of our school day.  We guide students to stop and notice where they are and how far they’ve come.  What goals they’ve achieved and what more they need to accomplish.  What if we paired student’s own reflections with images of them at work or a sample of the work itself?  Students can create and archive them digitally or printed, share them with parents, and display them in any way they choose.  These powerful moments capture and honor process over product and value the student’s own words and observations about themselves as learners.

Reflection.jpg

Image Credit: http://www.morguefile.com/archive/display/944212


Getting Started

Creating these visuals is surprisingly really easy!  To make the images in this post I used Canva a free webbased tool with ready made layouts and simple options which you can master with a bit of play time and experimentation.  You might use photographs from your classroom or students can take their own photos.  In this case I’ve used images from two sites that offer free pictures for use in creative projects. (listed below)  If needed you can do a little footwork ahead of time and build an image bank for or students to streamline the process.  These can be stored on a device, USB key, shared photo roll, or shared Google drive or Dropbox folder.


The images in this blog post are from the following websites.  


Morguefile offers free stock images to use in creative projects.  These images are intended to be altered by the user.

https://www.morguefile.com/archive


Unsplash also offers free images and is a creative commons zero site.

https://unsplash.com/


Canva is a web based tool (they also offer an app) for creating digital images, infographics, and art.  While there are paid options within the app it is easy to avoid these and use your own.

https://www.canva.com/


One Little Word: Energize

I started doing One Little Word many years ago, inspired by the ladies at Two Writing Teachers.  You can read my post from last year on how I used One Little Word with my students here.  This post is about my word for 2016.

This year I chose the word Energize.  Energize.  Every time I say it I think of Star Trek and imagine myself standing on the teleporter pad barking the command “Energize!”  If only it were that easy.

It’s not a mystery.  With a toddler and a three month old baby at home I don’t have much energy because I don’t sleep much.  Let’s face it, I never exercise and I’m usually eating the dinner I made for my toddler (because why would she eat it?) one-handed while I rock/bounce/jiggle/sway the baby with the other. Most of my energy comes from coffee and my own tears as I pull gobs of post-partum hair from my head wondering if I’m doomed to a life of wearing hats.

There are some things that are beyond my control such as whether my baby sleeps through the night or whether I’ll be forced to attend a late night bouzouki party with Greek family.  But little things like making choices that give me energy are with in my control and so I’d like to start there.

Energize my body with good food and activity, whatever I can get.

Energize my mind with interesting books, media, and conversation.

Energize my heart with kind actions towards others.

Energize my colleagues by helping them find what they need to have a joyous day.

Energize my hair with all natural vitamins, snake oil, and magic.

Energize 2016!

IMG_8969.PNG
For the year 2016 I chose the word Energize.  I want to energize my mind, my body, and my approach to life.

Tweets As A Nonfiction Text Feature

Earlier today I was looking for resources on extreme weather for one of my teacher teams and stumbled on this article.  Below is a screenshot or you can click the link to read the entire thing.

Screen Shot 2015-11-10 at 1.47.19 PM

It gave me pause for thought because it’s peppered with embedded Tweets like the one in the image below.  Now this is nothing new to me as an adult reader and a Twitter user.  But I wondered how many students would recognize this new type of nonfiction text feature and know how to approach it.  What might we want students to consider when they encounter an embedded tweet in an article?

Perhaps that there has been a shift in author?  Therefore a possible shift in validity.

How do we look at the source and decide if it’s reputable?  Is this an expert in the field like a weather person?  Is this someone who is giving us a “from the scene” perspective?

What image literacy skills might students need to interpret, connect, and synthesize the tweets with the body of the article?

We’d love for you to share your experiences if you’ve tried using any articles with embedded tweets with your students.

The Value of Screencasting

Building on our recent digital artifacts discussion I thought we might take a minute to look at the value of using screen casting in the classroom.  When I first learned about screen casting my initial thought was “what a great tool to use in math!”  I began to create quick tutorials for students to help them learn concepts and strategies.  These were shared on our website so that any student (or parent) who needed to could access them.  I would use QR codes on class charts to provide quick access to certain tutorials and make the charts come alive.  And all of these things were great, but…

I was starting to feel like my own little Khan academy.  Sure it was personalized to our curriculum and the learning we were doing directly in class.  But I  couldn’t shake the nagging feeling that this was a tool that should be in the hands of STUDENTS!

You see, unless you can sit and watch kids solve and think through problems there are essential pieces of information that you miss.  I would look at papers and see erasure marks, sometimes down to holes in the paper, and wonder what process had taken place to get the student to the end goal.  Where was their understanding breaking down?   If they caught a mistake in their process how and why and when?  I thought perhaps if I could get them screen casting that I would have answers to these questions and I could be a better math teacher.  In the end, I was right.

Let’s look at an example of a screen cast from a former student of mine.  In this screencast she is doing something that we call an “interactive” screencast.  This is where the student is creating the screen cast for an audience and is tasked with engaging the audience to solve the problem, then provide an explanation as to the correct answer.  It’s one of the many formats we brainstormed as a class so that students understood that screen casting is not just a digital quiz to be turned into the teacher, but that we often have different purposes and audiences for creating them.

As you watch think:

  • What does this student already know?  What is she able to do?
  • What questions do you have about her process?  What do you assume she had done mentally that we don’t see?
  • What evidence do you see that she understands the concept?  At what level does she understand it?  (Is there evidence that her understanding goes beyond just being able to apply an algorithm?)
  • What feedback would you give this student about her screencast?  About her math process?
  • What are some next steps for this student?

We’d love for you to share your thoughts in the comments!